This post is for my RVing friends who might be interested
in learning about an often overlooked but very important
and easy maintenance task.
Last December I had new disc brakes and suspension installed so it was not
critical that I perform this maintenance right now but I'm never happy until I poke my
nose (or fingers) into where some other mechanic has been to give myself the warm
and fuzzies that the job has been done right.
Since we are going to be hitting the road in a few weeks now was the perfect time
to repack the trailer wheel bearings and inspect the brakes.
Good thing that I did... as you will see.
First thing is jack up the rig.
I then put jack stands next to the jacks and put some weight on the
Jackstands for safety purposes.

Next - remove a tire.
Then I start to remove the disc brake caliper.
There are 4 bolts to remove.

I wire the caliper up so that it does not hang on the break hose,
Then I can remove the disc brake rotor.

I take a caliper and measure each rotor.
Specs allow for 1.03" thickness.
Most of my rotors were around 1.09-1.1"
This one however was heavily scored on one side and
reading 1.04"+

The rotor should not be so scored...
Especially with only about 10,000 miles on it...
Something is wrong and I need to figure it out.

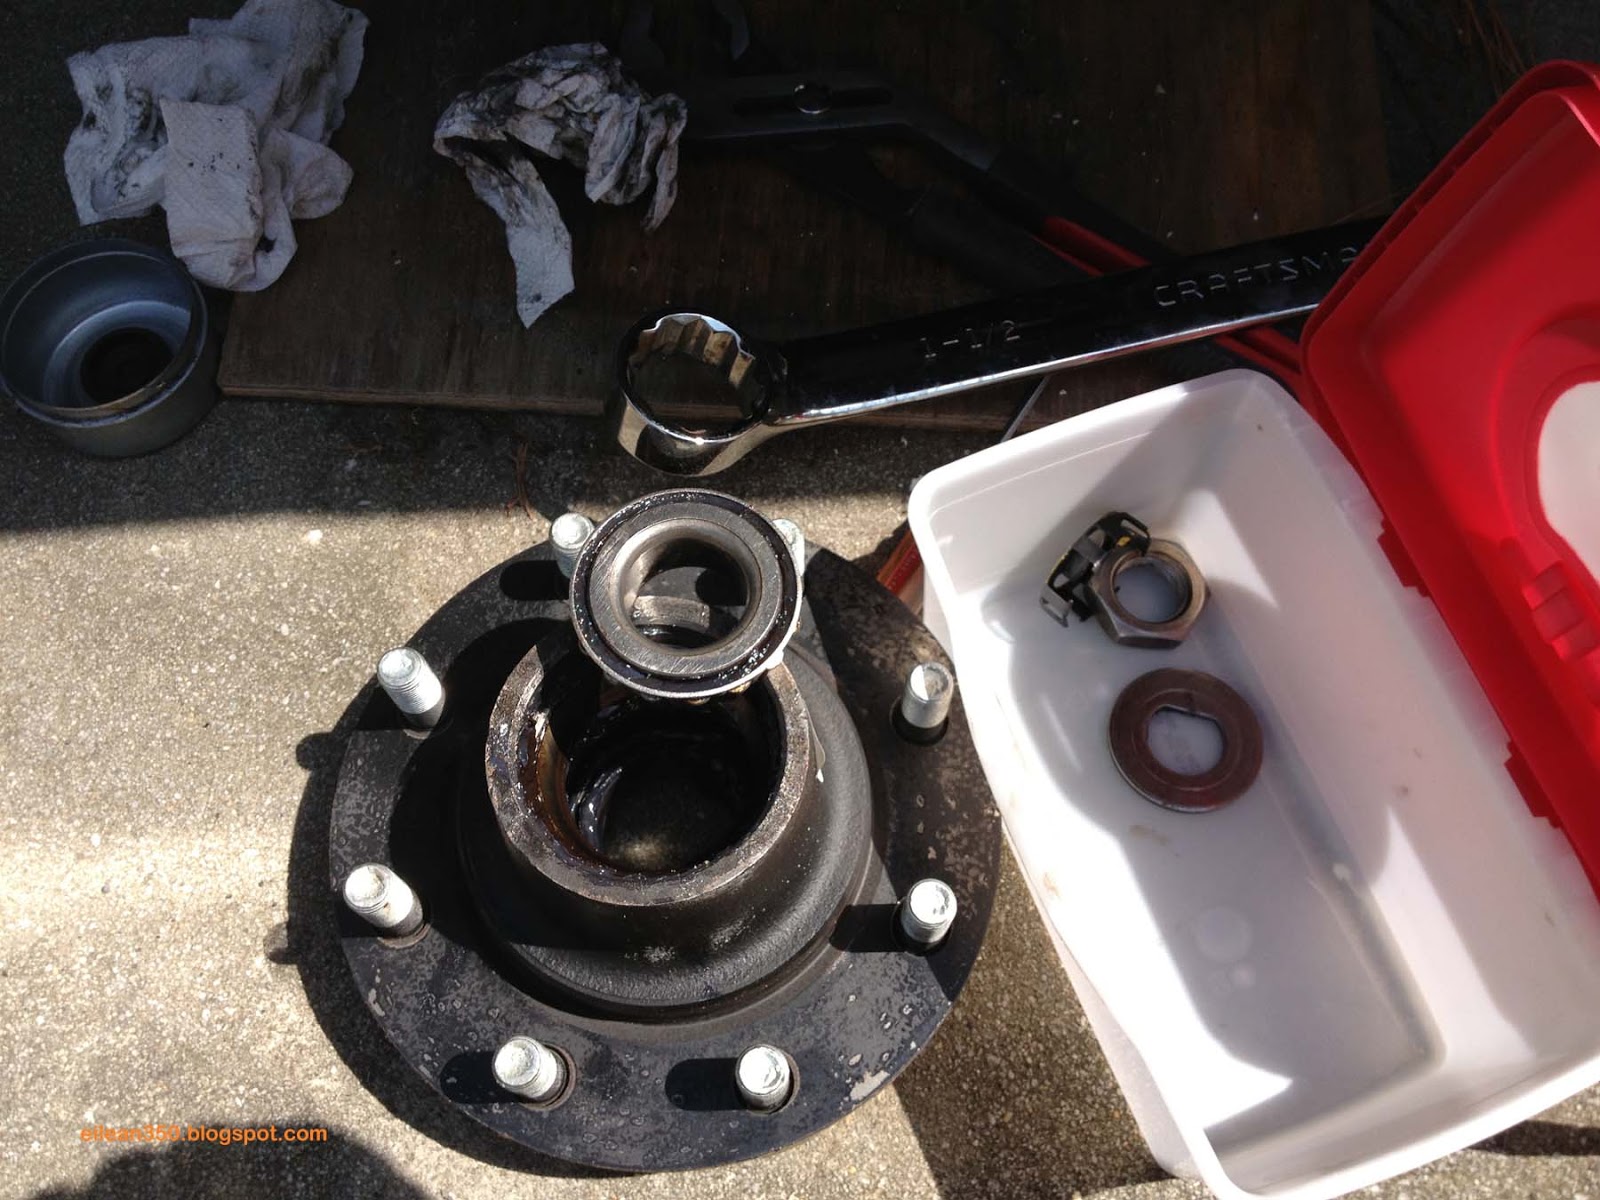
Meanwhile with the rotor removed, I now remove the dust cap on the hub
exposing the hub nut retainer.
Some rigs might have a cotter pin here instead of this yellow retainer ring.

Pry off the retainer or remove the cotter pin, and then remove the nut.
Mine is 1 1/2". They should only be hand snug. Mine were all wrench tight..
Another thing that is not right.
Too tight on the nuts can cause premature bearing failures.
With the retainer, nut, and washer removed,
you can now simply pull the hub off the axle.
Here I've done that and removed the outer bearing, wiped some grease off it.
You can see the parts starting to be collected in the white tub.
The axle with the wheel hub removed.

Now I turn to that brake to find out why the rotor was so scored and reduced in
thickness. A quick look at the caliper tells it all.
When they installed the pads - they put one of them on inside-out.
The pad on the left - look at it closely...
you will see the metal that should be to the left is instead on the inside.
That metal is supposed to be up against the brake piston.
Everytime I used the brakes that metal was getting pressed up against the metal
rotor.
Faulty careless installation workmanship.
Now you see why I like to check on them.
A quick call an email with some photos
and a new set of pads, a rotor, and caliper are on their way to me
under warranty.
Could have overheated, started a fire or worse.

Back inside in the shop with the hub, I've now turned it over.
To remove the inside bearing you have to remove the grease seal.
The seal gets destroyed in the process so make sure you have some when you
start the job or realize that you are going to need to get some before you wrap it up.
Just pry it out.

The seal is now removed exposing the inside bearing which can now be lifted out.

The inside (large) and outside (small) bearings.
As I said - the hub nuts were too tight and while my first two
wheels were ok, this one was not.
You will notice the outside bearing on the right is much darker.
The grease smelled burned and the metal was discolored indicative of overheating.
This one looks like I'm going to want to replace the bearings.

I now thoroughly clean up all the parts, the hub, the axle.
Using brake cleaner and a lint free cloth. I make sure that all parts are absolutely
spotless and no dust or grit is on any parts.
After cleaning them up with brake cleaner.
You can see the inside bearing is discolored and scored.
I also drove out the inside bearing race and you can see how it is scored.
Time to track down some more parts.

It's never easy to find parts around these parts so...
7 hrs of driving later I have the proper seals and bearings.
Even though the inside bearing looked ok, I like to replace
them in sets so I removed both races.
Here I'm driving the inside race down into the hub.
 |
Below I've replaced the inside bearing race and driven it down into
position. To do so I used a set of Race and Seal Drivers.
You can purchase a cheap set for $40 or so at most
auto parts stores.

Now I need to drive the outside race down into position.

And here it is in its proper spot ready for bearings.
Now wipe a tad of grease on the races.

I also wipe the inside of the hub down with a coating of grease.
You don't want to pack it full... that counter productive and the
grease does not flow like oil.
Just a wipe down to displace any moisture and prevent rust.
Here is the new inside bearing all packed and in position.
I now need to put the new grease seal in place.

Below is the new grease seal.
I coat mine with a thin layer of Permatex Aviation Sealer.
Dexter recommends it on their hubs but i know a lot of people don't
do it.... can't hurt.

Take a block of wood and lay it over the seal, then drive the
seal into position with a hammer..
Nice and easy - level all around.
All done - ready for the outside bearing.

Here I'm getting ready to pack the bearing.
You can do this by hand, but this cheap bearing packer does a great job.
Better than I could do by hand.
You put the top on, and pump grease into the center of the bearing.
If forces grease out of all the rollers.

I'm a big believer in synthetic lubricants for all purposes.
Rotella T6 in the Diesel and
for this I'm using Mobil 1 Synthetic Grease.
Below you can see the grease being forced out of the rollers.
A full packing of grease is critical for a good job and
reliable service from your bearings.

Fully packed ready for installation.
Doesn't that grease just look yummy?

Put the outside bearing back in the hub, wipe a tad of grease on the axle and
especially around where the grease seal will ride, slide the hub back on the axle
being careful not to push the outside bearing out while doing it.
Put the washer and nut back on and tighten down the nut while turning the hub.
Dexter calls for 50ft lbs.
Tighten down while turning the hub...
THEN DON'T FORGET TO LOOSEN IT.
Now that you've torqued everything into place -
STOP TURNING THE HUB AND BACK THAT NUT OFF TO HAND TIGHT.
Now hand tighten it till it makes contact and put your cotter pin
or nut retainer into place.
You want everything in place but no torque on the bearings from the nut.
Put the clean dust cap back on and the wheel bearings are done.

While I'm under there its time to check the independent suspension.
I look for tears in the rubber, any loose bolts or indication of movement
scrape marks on rust near bolts will hint at movement.
I grease the suspension swing arm.

I clean the pads and rotor with brake cleaner,
reinstall the rotor and then the caliper.

Finally I install the tire.
I put all eight nuts in and gently tighten while making sure the lug nuts center in the
holes. Eventually I'm able to put about 50 ft lbs on with a standard
lug nut T-wrench.
Then I drop the trailer some to put a bit of weight on the tire so that I can complete
torquing the bolts.
I first torque to 85 ft lbs
Then to 115 ft lbs.
Finally to 130 Ft lbs.

Well that takes care of 2 of them.
I have to wait to complete the other two tires till I get my replacement rotor
and pads, but in the interim I will have all the hubs greased and ready to go.
That's it.
It's pretty easy. Does not require a lot of skill, just a willing ness to get your hands
dirty.
The peace of mind knowing the job was done right is worth a lot more
than the money I save paying someone to do it for me.
I glossed over a lot of the steps - if you have any questions just send me an email
or leave a comment.
Hope you find this helpful.
I did wheel bearings on my 79 Chevy van but this looks more complex. Impressive job, outstanding post. Great job Greg.
ReplyDeleteHayden
Thank God you checked everything! You're driving around precious cargo after all!! You should be teaching a course! Safe travels!!
ReplyDeleteWith those detailed instructions and photos Kate should be able to do it next time.
ReplyDelete